There's nothing quite like biting into a warm, freshly fried donut with that perfect balance of a thin, crisp exterior and pillowy interior! But wait, there is! A Sourdough Donut! When you add the slightest tangy notes of sourdough to the mix, you've got an irresistible treat that elevates the humble donut to artisanal status.
What makes my recipe special is that we use a small amount of instant yeast alongside the sourdough starter, which ensures reliable rising and enhances the airiness of the final product.
Main ingredients
Sourdough discard or active starter
Instant yeast for foolproof rising
Blend of all-purpose flour and bread flour
Sugar, Butter, Milk, and Salt
Coconut oil for frying
Glaze made from powdered sugar, milk, and vanilla extract
Required equipment
Stand mixer with dough hook
Biscuit cutter
Candy thermometer for oil temperature monitoring
Heavy-bottomed pot for safe, even frying like a Dutch oven
Cooling rack for proper draining and icing
Parchment paper for proofing shaped donuts
The magic of sourdough donuts
It may sound counterintuitive to introduce tanginess to a sweet treat, but the natural fermentation creates complex flavor dimensions that are impossible to achieve in regular donuts.
In this recipe, I complement the sourdough starter with a small amount of instant yeast to kickstart the rising process. This combination controls the tanginess while producing the perfect balance: classically airy donuts with a nice subtle depth of flavor.
A healthier donut indulgence
Another reason to obsess over these Sourdough Donuts is their improved digestibility and nutritional profile. Let's be honest—we're all looking for justifications to indulge in sweet, fried treats, and this recipe delivers the perfect excuse! The extended fermentation process of sourdough makes these donuts significantly more gut-friendly than traditional versions.
Beyond the sourdough benefits, I've chosen coconut oil for frying results in a clean, light finish without any overwhelming flavor. This choice offers an excellent health alternative to heavily processed oils like canola, vegetable, or peanut varieties. It's the perfect marriage of indulgence and mindful ingredient selection!
Step-by-step dough prep
Day 1: Mixing the Dough
Warm the milk: Heat 100g of milk in the microwave for approximately 30 seconds or on the stovetop until just warm to the touch (not hot). The ideal temperature is around 90-95°F (32-35°C).
Prepare your flour mixture: In a medium bowl, combine 175g all-purpose flour and 200g bread flour. Whisk together to ensure even distribution. Set aside.
Begin the wet mixture: In the bowl of a stand mixer fitted with a dough hook, add the 100g warmed milk, 200g active sourdough starter, and 60g sugar.
Add the yeast: Sprinkle 7g instant yeast over the milk mixture. Allow it to rest for 5-10 minutes. You'll know the yeast is active when you see small bubbles forming and can smell the distinct yeasty aroma.
Add remaining wet ingredients: Add the egg, melted butter (quantity not specified in original instructions, recommend 30-45g), and a pinch of salt (approximately 4-5g) to the mixture.
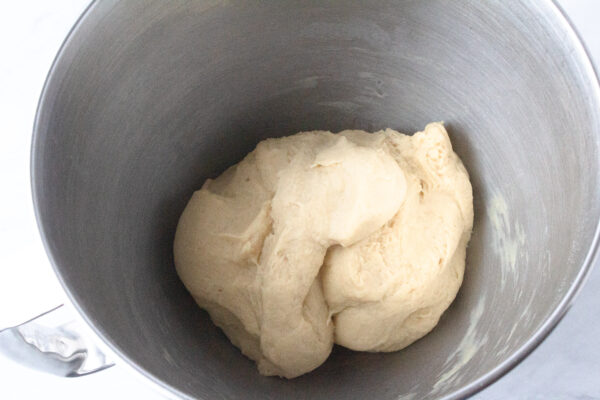
Incorporate the flour: With the mixer running on low speed, gradually add the flour mixture in three portions. Scrape down the sides of the bowl as needed to ensure all ingredients are incorporated.
Knead the dough: Increase the mixer speed to medium-low and knead for 7-10 minutes. The dough should become smooth and elastic, pulling away from the sides of the bowl while remaining slightly tacky.
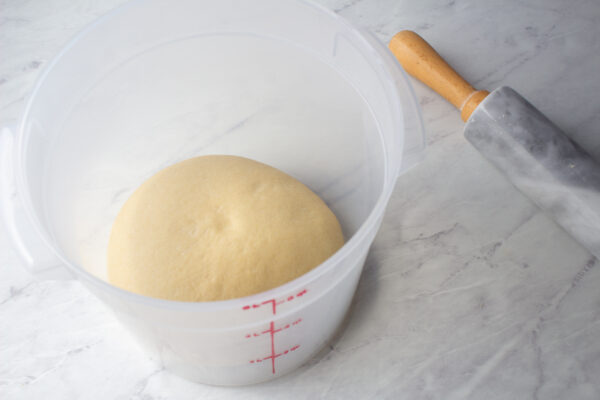
First rise: Transfer the dough to a lightly oiled bowl. Cover with plastic wrap or a damp kitchen towel. Allow to rise in a warm spot (75-80°F/24-27°C) for 1-2 hours, or until doubled in size.
Cold fermentation: Once the dough has doubled, cover tightly and place in the refrigerator overnight (8-12 hours). This slow fermentation develops the complex flavors that make sourdough donuts special.
Day 2: Cut, Proof, Fry & Glaze
Cut & proof
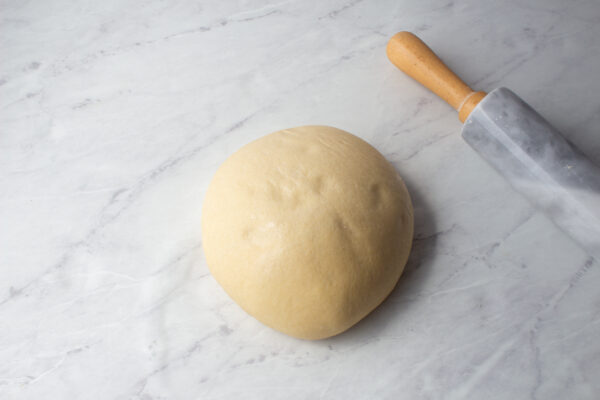
Warm the dough: Remove the dough from the refrigerator and let it sit at room temperature for 30 minutes to take the chill off.
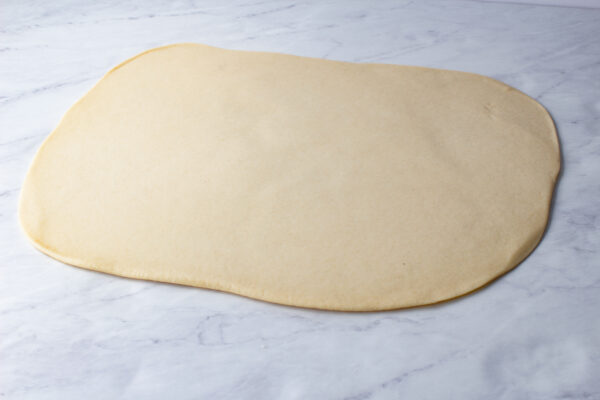
Prepare the work surface: Lightly dust your countertop with flour. Turn the dough out onto the floured surface.
Roll out the dough: Using a rolling pin, gently roll the dough into a rectangle approximately 1 inch thick. Work carefully to maintain an even thickness throughout.
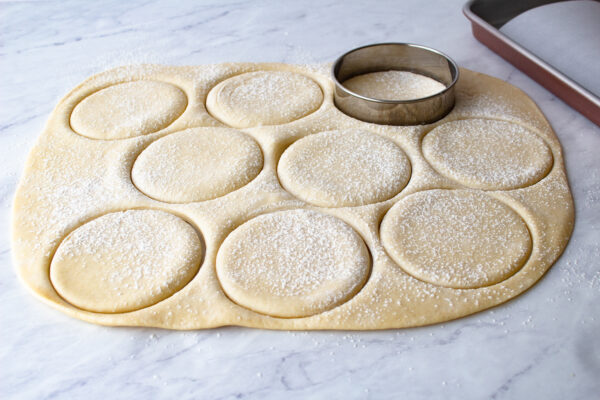
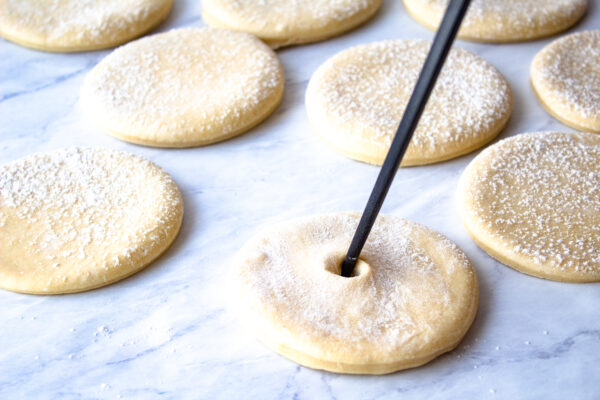
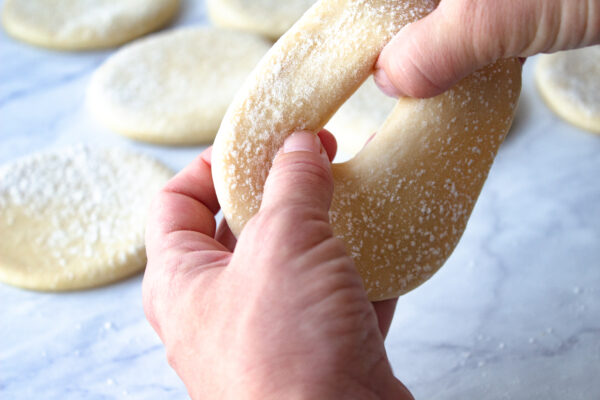
Cut the donuts: Using a 3-3.5 inch biscuit cutter (or similarly sized round cutter), cut out as many circles as possible, working close to the edges to maximize yield. Then, use a chopstick to create a hole in the center and gently pull open with fingers.
Set aside some scraps: Use some for a test batch for frying.
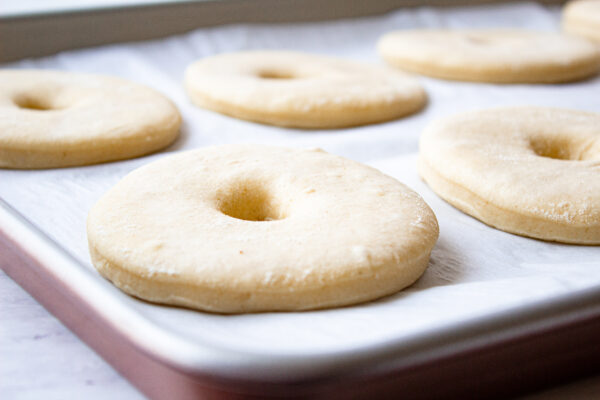
Final Proof: Place the cut donuts on a parchment-lined baking sheet, leaving 1-2 inches between each piece to allow room for expansion.
Cover the donuts with plastic wrap, a damp kitchen towel, or an inverted baking sheet. Place in a warm spot (75-80°F/24-27°C) and let rise until nearly doubled in size, approximately 45-60 minutes. When properly proofed, the donuts will be light and airy to the touch.
Fry the donuts
Prepare your workspace for frying: Before heating the oil, set up a cooling rack placed over paper towels or a baking sheet.
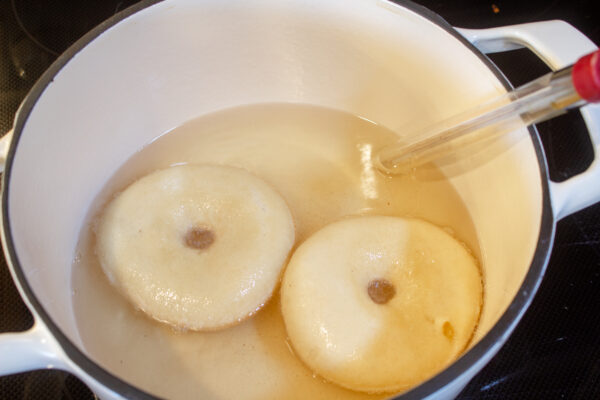
Heat the coconut oil: In a small heavy-bottomed pot or Dutch oven, add approximately 3 cups of coconut oil, ensuring it's at least 2-3 inches deep. Heat the oil to 350°F, using a candy/deep-fry thermometer to monitor the temperature.
Temperature management: Watch the temperature carefully. If it rises above 350°F, temporarily remove the pot from the heat. If it drops below 350°F, increase the heat until the temperature returns to the target.
Test batch: Fry a piece of scrap dough first to test the oil temperature and get a feel for the frying process. The test piece should bubble vigorously and turn golden brown in about 1-2 minutes per side.
Fry the donuts: Once the oil temperature is stable at 350°F, carefully add 2-3 donuts to the oil. Don't overcrowd the pot, as this will cause the temperature to drop significantly.
Cook until golden: Fry for approximately 1-2 minutes on the first side, or until golden brown. Flip using wooden chopsticks or a slotted spoon and fry for an additional 1-2 minutes until the second side is also golden brown.
Remove and drain: Carefully remove the donuts from the oil and place on the prepared cooling rack to drain excess oil. Continue frying the remaining donuts in small batches, allowing the oil to return to 350°F between batches.
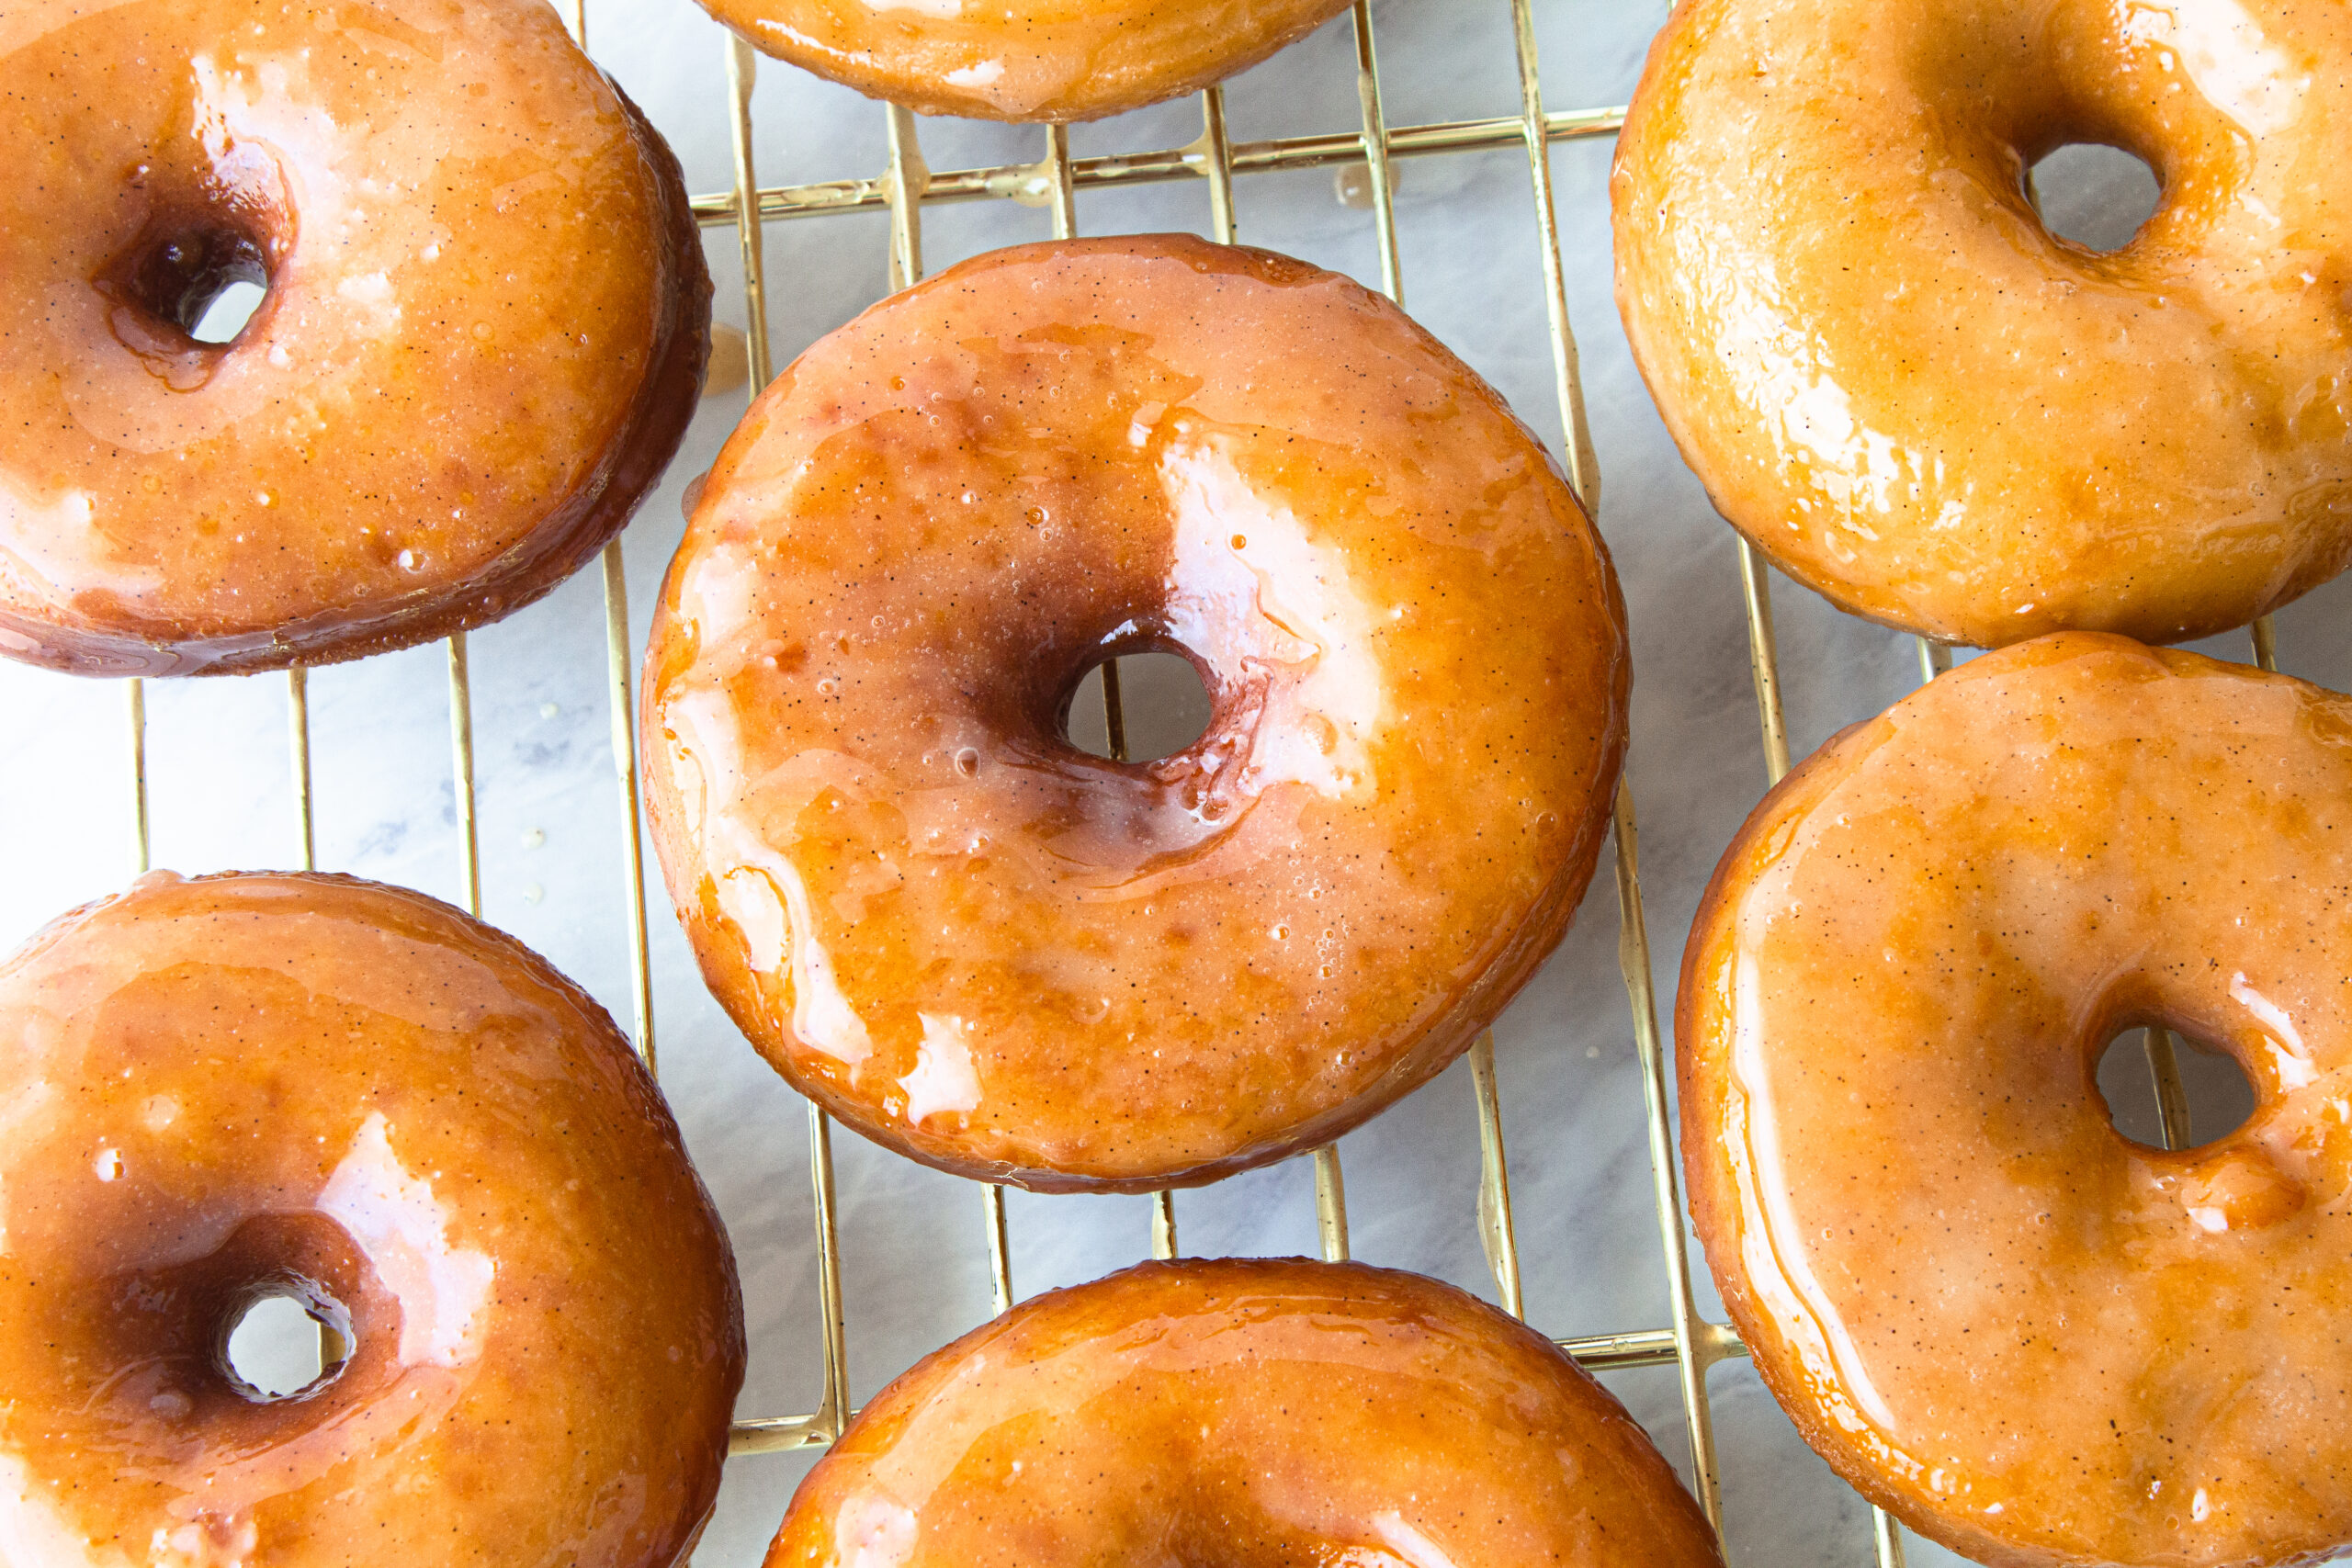
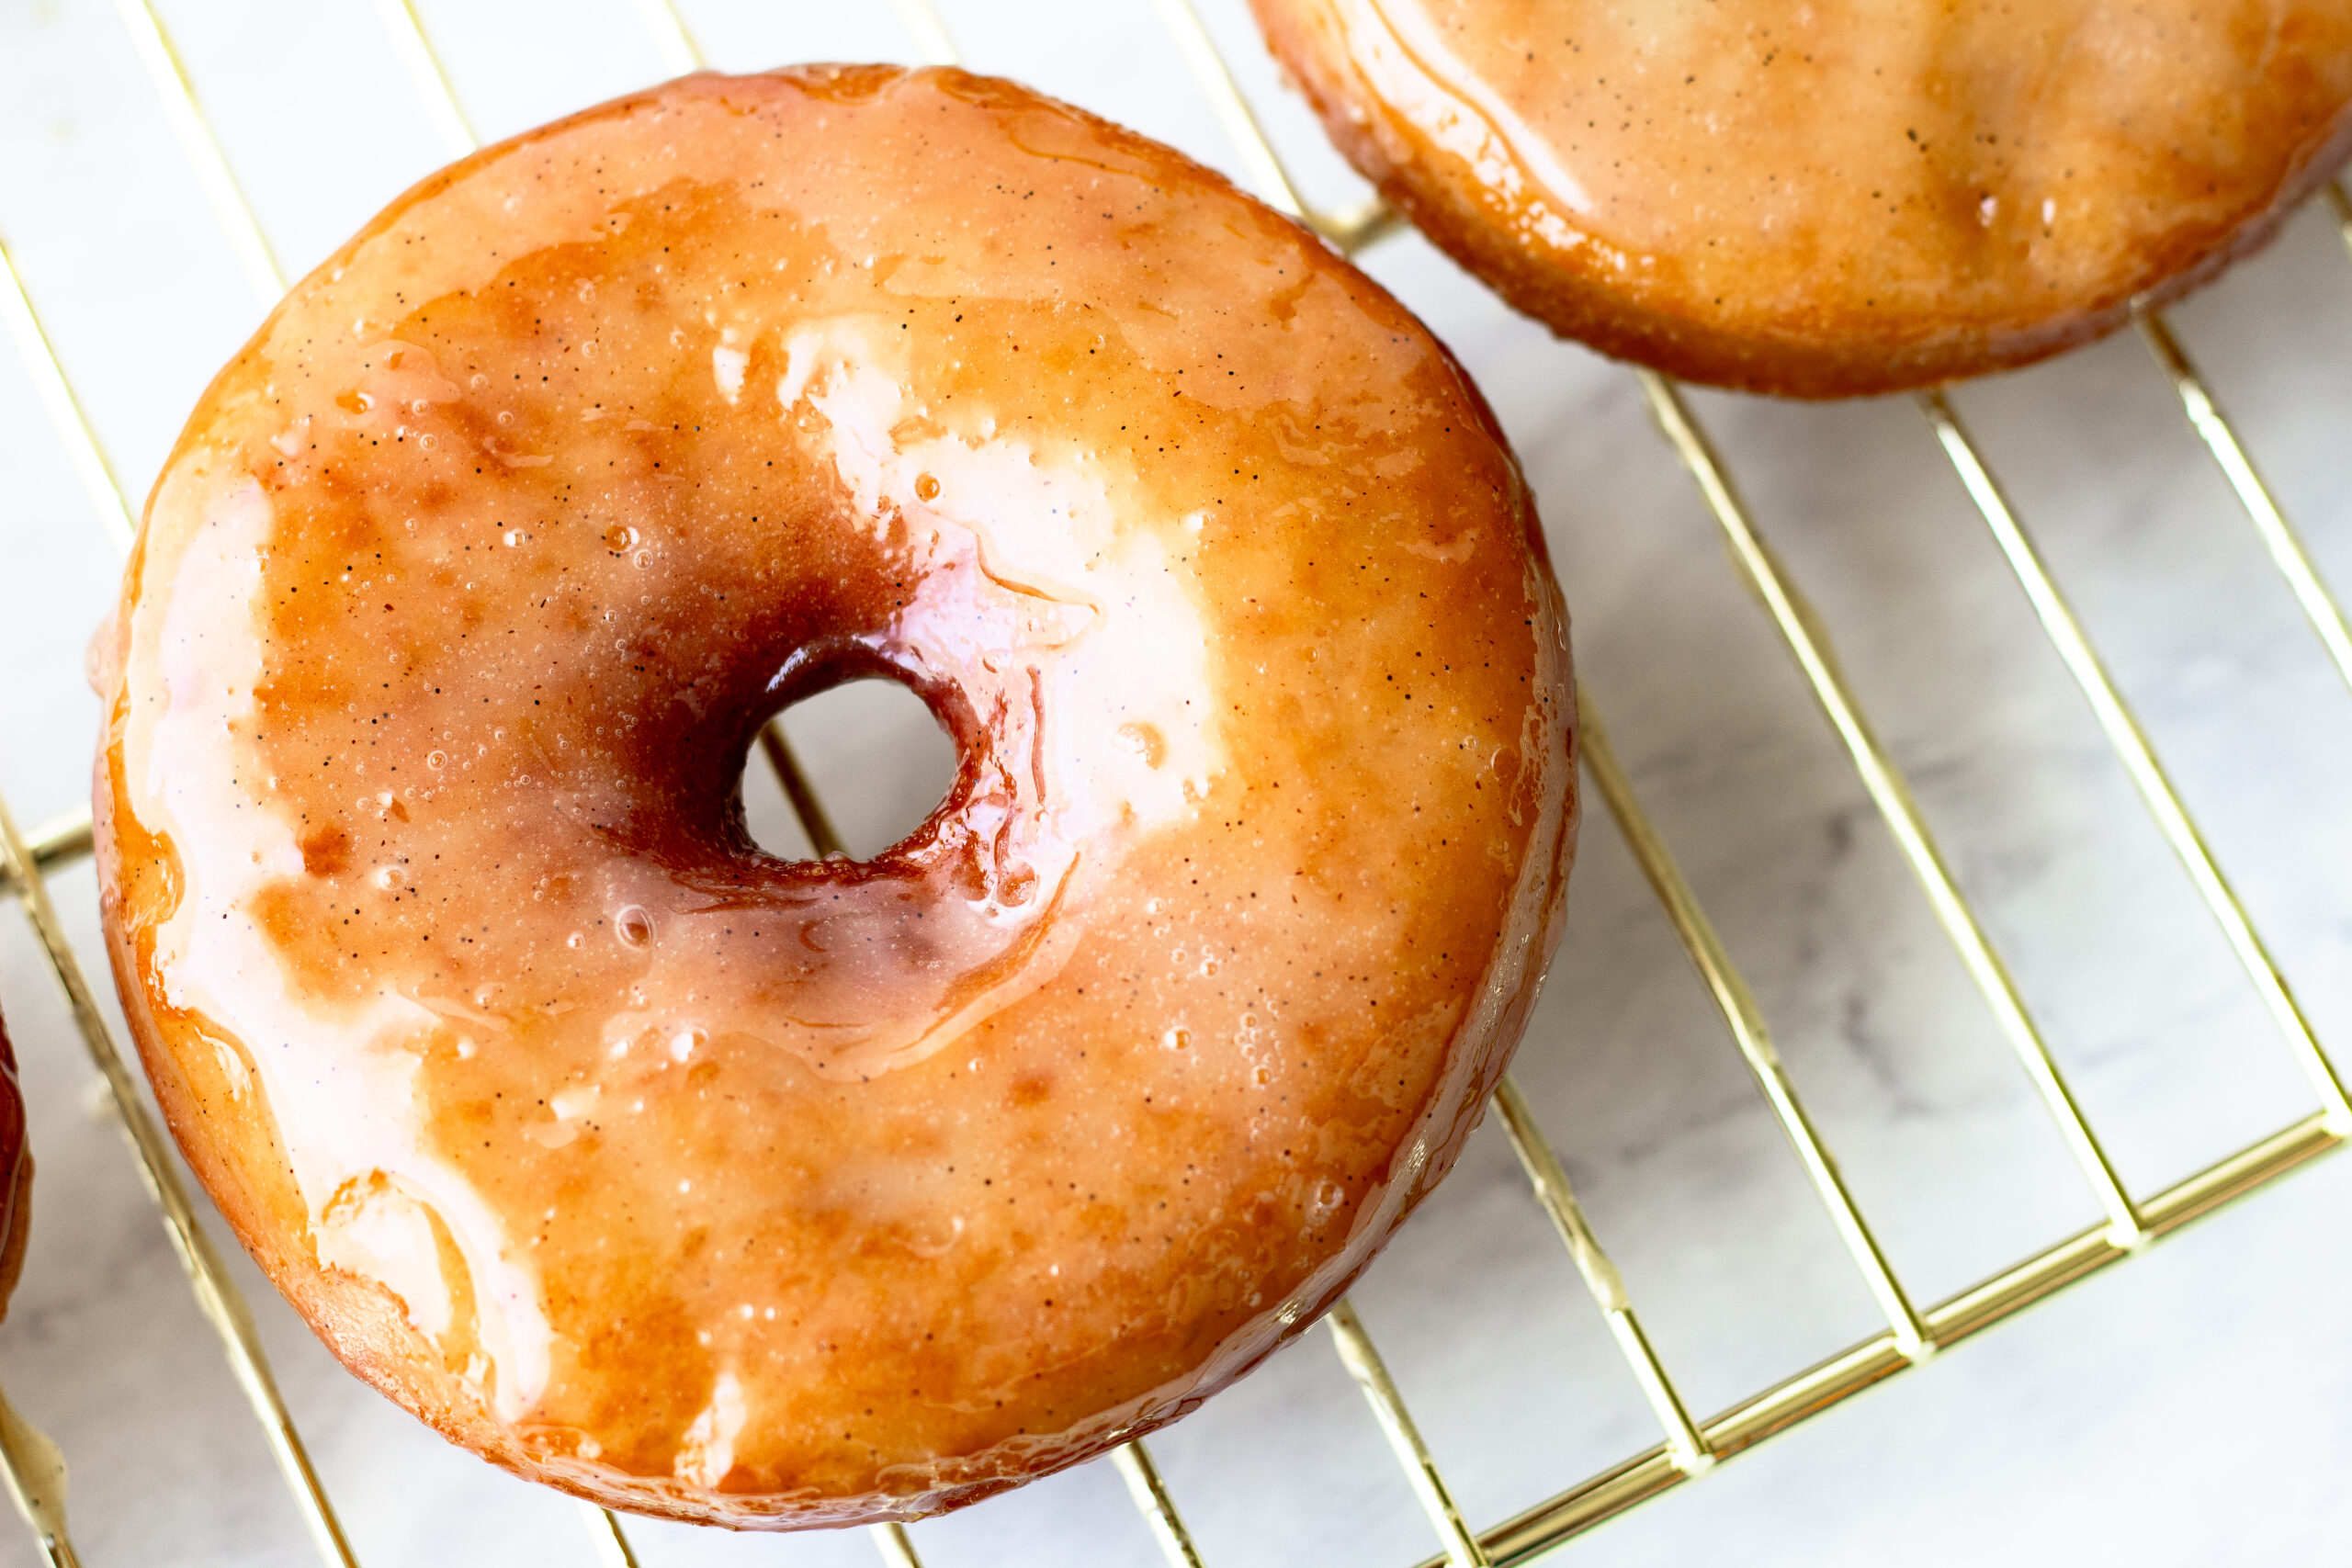
Dip each donut in the glaze: Dunk each donut in your bowl of glaze once they are cool enough to handle but still warm.
Glaze the donuts
Prepare the glaze: In a wide, shallow bowl, whisk together 115g confectioner's sugar, 70g milk, 2g vanilla extract, and a small pinch of salt until smooth.
For a thinner glaze: Add more milk, 1 teaspoon at a time
For a thicker glaze: Add more confectioner's sugar, 1 tablespoon at a time
Glaze while warm: While the donuts are still warm (but not hot), dip the top side into the glaze, ensuring even coverage.
Flip and set: Carefully flip the donut over and place back on the cooling rack, glazed side up. The excess glaze will drip through the rack.
Serving and storage
Best served warm!
Same-day storage: If not consuming immediately, store at room temperature in an airtight container for up to 8 hours. The texture will change slightly but they will still be delicious.
Reheating: To refresh, pop them in the microwave for 10 seconds.
These glazed sourdough donuts are the perfect marriage of the traditional donut comfort + artisanal sourdough technique! While they require some planning with the overnight fermentation, it’s well worth the wait to share these scrumptious goodies with your loved ones, friends, or just you. So put that sourdough starter to work beyond bread and treat yourself to these extraordinary homemade donuts!e everyone asking for your secret!